Building A PR preview system with a Raspberry Pi and a little hope

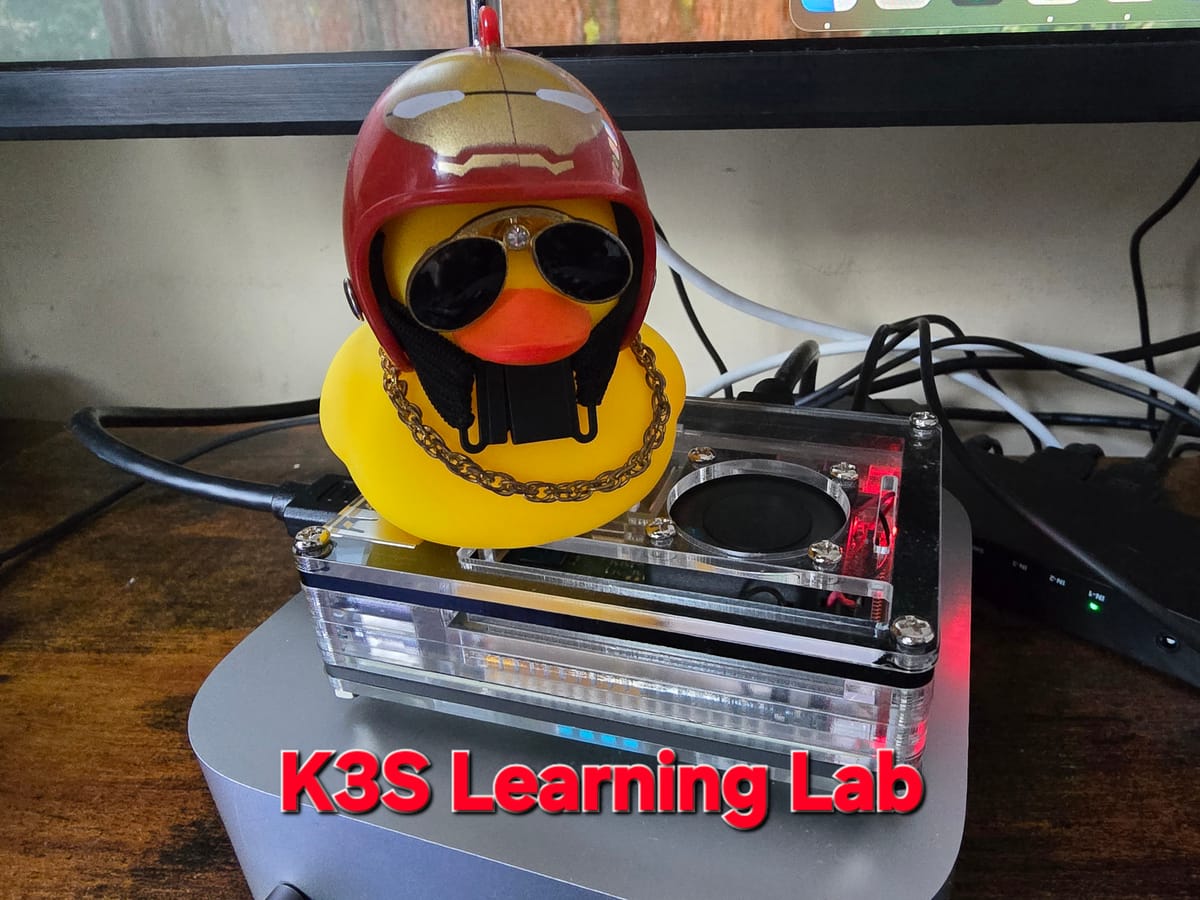
In my previous blog post, I got started with k3s on my Raspberry PI, which mainly involved installation and then eventually deploying a containerized node app directly to the cluster from Docker Hub. I wanted to expand on that a little this week and try my hand at starting a PR preview system using GitHub webhooks. The goal for this week was to use the webhooks to create a k3s namespace, deployment, and service per PR, and post a comment to that pr with the preview URL included.
As with all of my projects, I started with an 'ugly' version first, then iterated to make it prettier as I went (and will continue to do so in future blog posts).
So let's start with the "smack it with a wrench and make it work" approach first.
The "it works" version.
A surprising amount of the parts from this are actually still valid, but let's start with the code that worked first, then expand on why it isn't exactly ideal:
const { execSync } = require('child_process');

function deployPreview(prNumber) {
  const namespace = `pr-${prNumber}`;
  execSync(`kubectl create namespace ${namespace}`);
  execSync(`kubectl create deployment preview-app \
    --image=myapp:latest \
    --replicas=1 \
    -n ${namespace}`);
  execSync(`kubectl expose deployment preview-app \
    --type=NodePort \
    --port=3000 \
    -n ${namespace}`);
}

function deletePreview(prNumber){
  const namespace = `pr-${prNumber}`;
  execSync(`kubectl delete namespace ${namespace}`);
}
It's pretty easy to understand actually, I basically receive the pull request number from the webhook and use execSync from the node "child_process" module to execute shell commands directly from the Express.js web app I have running.
This works for basic functionality, actually. I was able to see the namespace, pods, and service all get spun up, and it even posted a comment directly to the PR that I was creating (that code will be coming in a later section). The delete preview would then delete the namespace (and all the other resources as a result) whenever I closed the PR.
There's a flaw in it, though. What happens when I run this command on a pull request and the namespace for that pull request already exists? Also, what happens when kubectl isn't installed? How do you even test something like this? (all of these problems I ran headlong into, like my golden doodle does the wall when his soft paws can't get traction in my kitchen, and he smells bacon).
Obviously if any of these went wrong I'd have to add some error handling around the commands that kinda looks like this:
try{
 execSync(`kubectl create namespace ${namespace}`);
}catch(e){
if(err.stderr.includes('Already Exists')){
//pass
}
}
That kinda works, but realistically, I'm just debugging the shell commands and not really working with Kubernetes. That treats k3s only like a cli tool rather than the full distribution that it is. The solution to this ended up being that I could just use an API to interact with kubernetes.
The Kubernetes Solution
Turns out that there is a node library '@kubernetes/client-node' that exposes a lot of the operations that I was doing previously via shell command. I just refactored my previous functions to use that library, and we get something a little more useful when it comes to debugging. It also lets me add a little more error handling to grab some of the cases I described before. Even better note, it has types 😍.

Here's the code That deploys the preview and deletes the preview:
import { kApi, kApps, kNet } from "./client";

interface IDeployParams {
    namespace: string;
    hostname: string;
}

export const deployPreview = async ({ namespace, hostname }: IDeployParams) => {
    try {
        await kApi.readNamespace({ name: namespace });
        console.log("Namespace already exists, skipping deployment")
        return;
    } catch (e: any) {
        if (e.code !== 404) throw e;
    }
    try {

        await kApi.createNamespace({ body: { metadata: { name: namespace } } });
        await kApps.createNamespacedDeployment({
            namespace,
            body: {
                metadata: {
                    name: 'preview-app'
                },
                spec: {
                    replicas: 1,
                    selector: { matchLabels: { app: 'preview-app' } },
                    template: {
                        metadata: {
                            labels: { app: 'preview-app' },

                        }, spec: {
                            containers: [{
                                name: 'preview-app',
                                image: 'barnettet31/k3s-demo:v1',
                                ports: [{ containerPort: 3000 }]
                            }]
                        },
                    }
                }
            }
        });
        await kApi.createNamespacedService({
            namespace,
            body: {
                metadata: {
                    name: 'preview-app'
                },
                spec: {
                    type: 'NodePort',
                    selector: {
                        app: 'preview-app'
                    },
                    ports: [{ port: 3000, targetPort: 3000 }],

                }
            }
        });
        await kNet.createNamespacedIngress({
            namespace,
            body: {
                metadata: {
                    name: 'preview-ingress'
                },
                spec: {
                    ingressClassName: 'traefik',
                    rules: [{
                        host: hostname, http: {
                            paths: [{
                                path: '/', pathType: 'Prefix', backend: {
                                    service: {
                                        name: "preview-app",
                                        port: { number: 3000 }
                                    }
                                }
                            }]
                        }
                    }]
                }
            }
        })
    } catch (e: any) {
        console.error(`Failed to deploy PR, cleaning up:`, e.body?.message || e.message);
        try {
            await deletePreview({ namespace, hostname });
        } catch (e: any) {
            console.error("Failed to cleanup", e);
        }
    }
}

export const deletePreview = async ({ namespace }: IDeployParams) => {
    try {

        await kApi.deleteNamespace({ name: namespace, })
    } catch (e: any) {
        if (e.code === 404) {
            console.error("Namespace already deleted");
            return;
        }
        throw e;
    }

}
Setting up the client was pretty easy, too. I could load the details from my local machine:
import * as k from '@kubernetes/client-node';

const kc = new k.KubeConfig();
kc.loadFromDefault();
kc.setCurrentContext('default');
export const kApi = kc.makeApiClient(k.CoreV1Api);
export const kApps = kc.makeApiClient(k.AppsV1Api);
export const kNet = kc.makeApiClient(k.NetworkingV1Api);
These take in the namespace and some metadata about the resources that they are setting up, like the selector to connect everything, the namespace being deployed, port numbers for handling networking to the pods, etc. Then it just uses the Kubernetes API to do the same thing as the kubectl commands from before. I get some error handling, can clean up if I fail to deploy a preview, and can check to see if a preview already exists before either trying to set one up or shutting it down, and handle them properly. For now, I just decided to launch the same Docker container as I did in my first blog post. I might continue on to make something more specific for the app I'm building at the time, but baby steps for now.
On to the github portion of this project...
Github Application & Webhook
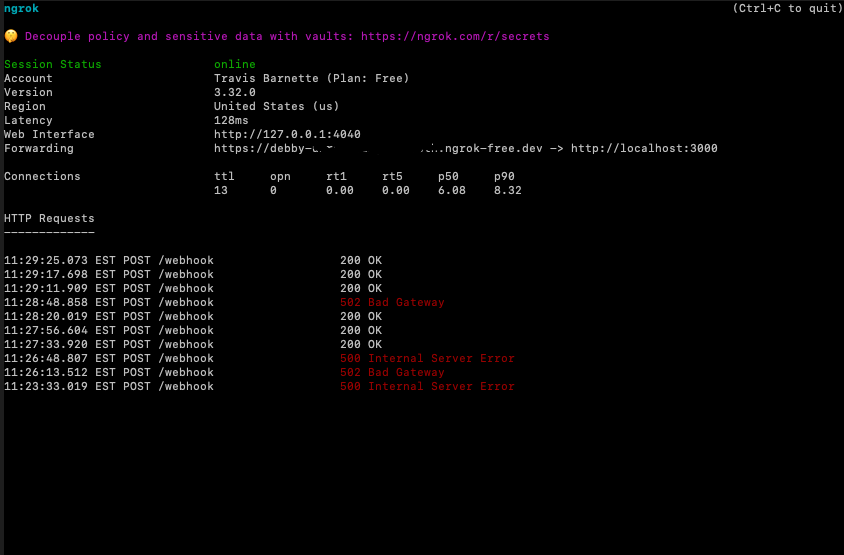
I didn't know this before the project, but you can actually have a GitHub application make a post to a basic web listener whenever actions are taken on a repository that the application is installed on. For the purposes of this project, I created my own app on GitHub and then used ngrok to deliver to my local host project instead of going through all the mess of deploying my Node app this early. Ngrok is just a tool that makes a public URL that can be used as a tunnel to my local dev server. So I can put something like "https://debby-stuff.ngrok-free.dev" into the config for the webhook, and ngrok will automatically redirect traffic to that local server that's running.
Ends up looking something like this:
It's a pretty useful utility. Anyways, from that stage I can use the '@octokit/webhooks', '@octokit/rest', and '@octokit/auth-app' to first react to the different PR hooks (pull request opened/reopened/closed), authenticate with a secret I created when I made the github application, and finally post a comment to the PR that was opened.
Here's the webhook handlers code:
const webhooks = new Webhooks({
    secret: process.env.WEBHOOK_SECRET || 'development'
});

webhooks.on('pull_request.opened', async ({ payload }) => {
    const namespace = `pr-${payload.pull_request.number}`
    const hostname = `pr-${payload.pull_request.number}.preview.local`;
    await deployPreview({ namespace, hostname });
    await makeComment({ payload, hostname });

});

webhooks.on('pull_request.reopened', async ({ payload, }) => {
    const namespace = `pr-${payload.pull_request.number}`
    const hostname = `pr-${payload.pull_request.number}.preview.local`;
    await deployPreview({ namespace, hostname });
    await makeComment({ payload, hostname });

});

webhooks.on("pull_request.closed", async ({ payload }) => {
    const namespace = `pr-${payload.pull_request.number}`
    const hostname = `pr-${payload.pull_request.number}.preview.local`;
    deletePreview({ namespace, hostname });
})
This is where I call the code created above to create the Kubernetes resources, and also where I add comments on open/reopen issues. If you're like me and love types...
You can use the '@octokit/webhooks-types' package for the payload when it arrives in those handlers and properly pass it down with type safety.
To add a comment, you authenticate, get a token, and publish a comment like this:
import { Octokit } from '@octokit/rest';
import { createAppAuth } from '@octokit/auth-app';
import fs from 'fs';
import { PullRequestOpenedEvent, PullRequestReopenedEvent } from '@octokit/webhooks-types';

interface IMakeCommentParams {
    payload: PullRequestOpenedEvent | PullRequestReopenedEvent;
    hostname: string;
}
export const makeComment = async({payload, hostname }:IMakeCommentParams)=>{

    const appAuth = createAppAuth({
        appId: process.env.GITHUB_APP_ID!,
        privateKey: fs.readFileSync(process.env.GITHUB_PRIVATE_KEY_PATH!, 'utf8')
    });
    const { token } = await appAuth({
            type: 'installation',
            installationId: payload.installation?.id
        });
        const octokit = new Octokit({ auth: token });
        await octokit.rest.issues.createComment({
            owner: payload.repository.owner.login,
            repo: payload.repository.name,
            issue_number: payload.pull_request.number,
            body: `Preview deployed!\n\nAccess at: http://${hostname}`
        });
}
That'll post a comment directly in the PR. Looks like this:
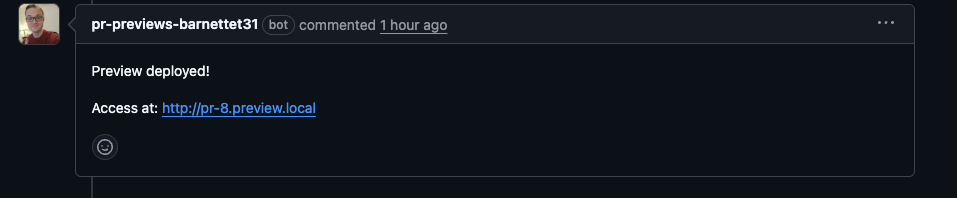
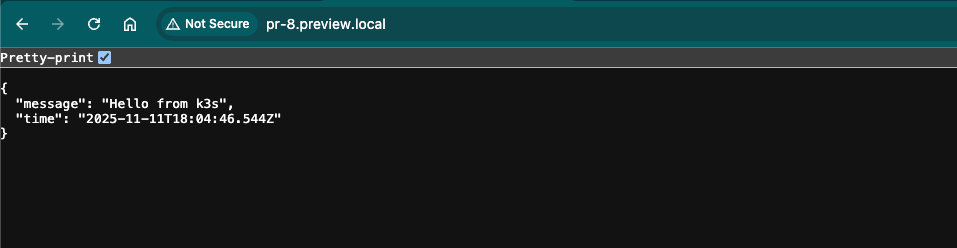
Closing the PR will then call our delete handler and clear the app preview. Clicking the link gets us the same output as the previous blog post:
Conclusion & Final Notes
I like the direction this tinkering is taking. I think I'm going to expand on it and try to actually deploy the thing that I am opening a PR on to my preview environment, maybe add some monitoring capabilities, and probably a good polling implementation (currently it doesn't ensure the deployment is finished before posting the comment). After that who knows? Maybe I'll push this into a production-like solution, but we will see where this takes me.
Note
The URL that gets opened, 'pr-8.preview.local', won't work if you go to it. I had to modify my host file on my Mac to point to the Raspberry Pi's IP address to get it to resolve correctly but that will be something that gets fixed when I eventually push this to an actual app or website on the internet.
